Update MONITOR G5 Server
MONITOR Installation Manager is used to update the software for MONITOR G5 Server. There is a shortcut to the program on the desktop of the server. From here, the update is completely automated. How long the update takes depends on how many databases you have in the system and the size of these databases.
Please note! No users can be logged in to MONITOR G5 when you run the update!
Effective from MONITOR G5 version 2.44 (inclusive), Microsoft .NET Framework 4.8 or newer must be installed on your server before the update of MONITOR G5 can begin.
- Start the MONITOR Installation Manager and select the Installed versions tab. Your installed (current) version is shown at the top of the tab. Click the button called Change version.

-
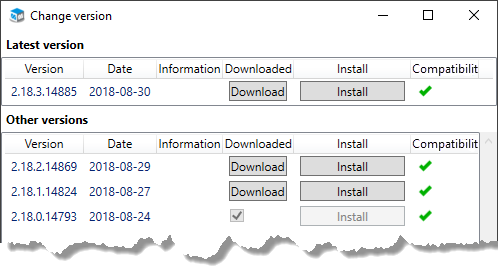
In the next step you see if there is a newer version to download and install. If there are more than one newer version to install under Other versions, you can choose the latest version under Latest version. Make sure that the version is compatible with your installed version. Then a green check mark
 is shown in the Compatibility column.
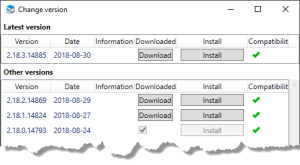
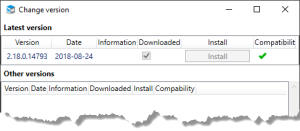
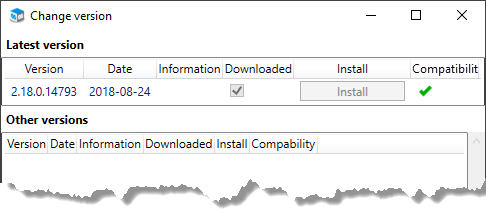
If there is no newer version you will see your current version under Latest version and it is empty under Other versions.
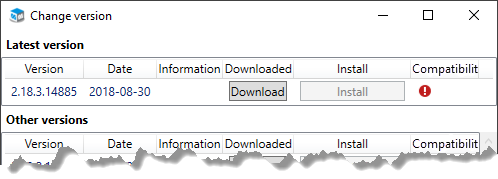
If the version is not compatible with your installed version this is shown in the Compatibility column with an error symbol
 . A tooltip over to the error symbol will let you know what is not compatible. In most cases it is a component which you first need to update.
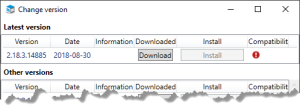
You update a component with the button Install under Other components. And this has to be done before you continue with the update of MONITOR G5 Server, in item 3 below.
-
Click the Install button in order to install the version. You can also click the button Download if you only want to download a version. After the download, a filled checkbox shows that the version is downloaded. You should then click the Install button in order to install the version.
-
When you have clicked Install, a dialog window shows the packages which will be installed. Click OK to confirm and start the installation.
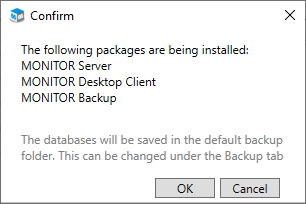
First, a backup is run for all the databases. This backup will include all company databases as well as test companies, the system database, and the company configuration file. The backup files are then saved in the folder Installation_backup under the standard path for backup files. You configure this file path under the Backup tab in the Installation manager.
Backup and update are completely automated. During the update a migration of the databases is made. You see the backup process and the migration progress in separate windows.
When the updates is completed you will be directed back to the tab Installed versions. At the top of the tab you now see the version you have updated to, as your installed version.
- Close the installation manager. The users can now do a first startup of MONITOR G5 after the update. Please note! It takes approximately 30 to 60 seconds for the server service to start after an update.

- Start the MONITOR G5 client in Windows. The program will then automatically start updating and then it starts.
-
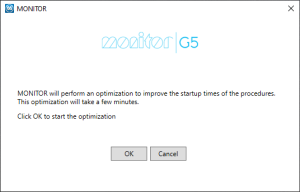
A dialog informs you that MONITOR will perform an optimization to get procedures to take less time to open. This optimization runs in the background while MONITOR G5 is started and it takes a few minutes. Click OK to start the optimization and MONITOR G5. Click Cancel if you wish to start MONITOR G5 without performing the optimization.
If the optimization was not run at the first startup (the user clicked Cancel in the above mentioned dialog), then it will not be possible to start the optimization at the following startups of the client. But it is possible to manually start the optimization. This is done by running the program MROS.UI.exe in the folder C:\Users\<user>\AppData\Local\Monitor ERP System AB\MONITOR Desktop Client\.

|
Feedback:
|
||

|
  
|