To create a data source, you must start MONITOR ODBC Data Sources on the computer that should access data from a company database in MONITOR.

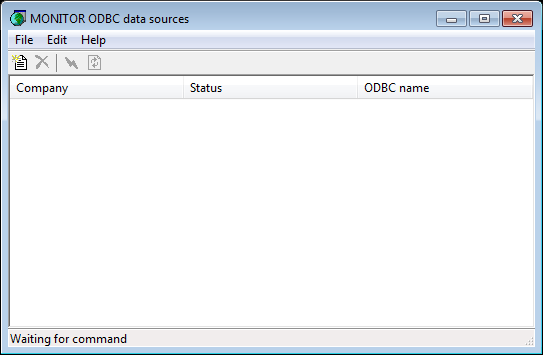
The MONITOR ODBC Data Sources program, before any data sources have been created.
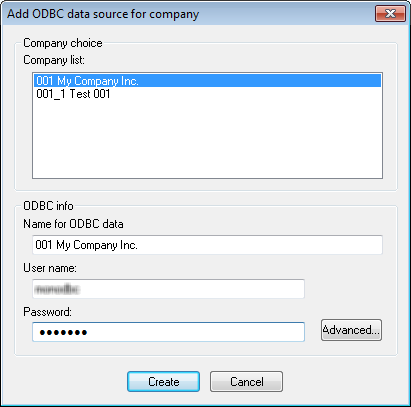
Once you have opened the program (which will only show an empty window the first time it is opened), you select New company... on the File menu, or use the button with the same name. In the dialog box under Company choice you select the company database for which you want to create a data source and you should also enter the User name* and Password* that will be used. Then click on Create. (See the image below).
![]() * The user name and password that should be used will be supplied to you if you participate in the course Database Access 1-2 in MONITOR. Read more about this course at www.monitorerp.com/customerweb/courses/.
* The user name and password that should be used will be supplied to you if you participate in the course Database Access 1-2 in MONITOR. Read more about this course at www.monitorerp.com/customerweb/courses/.

Dialog box for creating a data source.
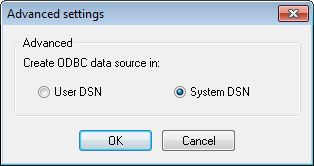
By using the button Advanced... you can also choose whether the data source should only apply to the current user account (User DSN) or apply to all users (System DSN) on the computer. System DSN is selected by default.

Advanced settings.
![]() It is only possible to create one data source per company database. If you have entered an incorrect user name or password, you must remove the data source and start again.
It is only possible to create one data source per company database. If you have entered an incorrect user name or password, you must remove the data source and start again.
After you have created the data source, an automatic test is run to check that it can connect to the company database. This is then shown in the program by displaying "OK" under Status. Each data source you create is displayed on a separate row in the program.

A correctly created data source.
If it is not possible to connect to the company database (if you for example have entered an incorrect user name or password) you will see the message "Failed to connect to company!" under Status.

An incorrectly created data source.
Please check and test the data source in ODBC Administrator as well, where it should now appear.