FAQ
Below you find answers to frequently asked questions about MONITOR G5 received by the Support Center at Monitor ERP System AB. These FAQ are maintained on an ongoing basis.
Finance
You can read how to create a credit invoice here.
You can read how to cancel a credit invoice here.
You can read how to credit a supplier invoice here.
You can read how to credit an expense invoice here.
You can read how to cancel a supplier invoice here.
You can read more about how to reverse an outgoing payment here.
You can read more about canceled payment suggestions here.
You can read more about canceling an incoming payment here.
You can read more about reversing a voucher and creating a rectification voucher here.
You can read more about reversing a voucher using the accrual method here.
You can read more about exporting/importing an SIE file here.
You can read more about changing the year here.
You can read more about Intrastat in MONITOR here.
You can read more about ISO payments here.
Planned values are loaded from customer orders, purchase orders, and manufacturing orders, whereas result is loaded from invoiced, linked to invoice, and reported values.
Time recording
If MONITOR has been configured to calculate shorter working hours, this is automatically worked out by the system when the days recorded are authorized in the Authorize/Adjust recording procedure.
Correspondingly, shorter working hours are reduced if you uncheck the Authorized box for a day in Authorize/Adjust recording, then save.
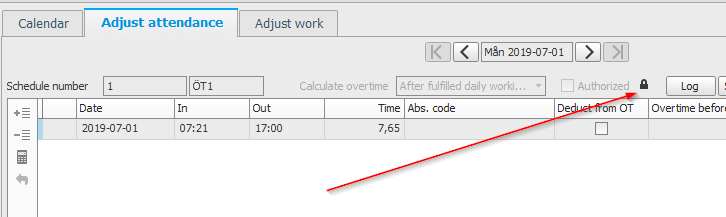
There is a function that allows you to lock days (records) for adjustment in the Authorize/Adjust recording procedure. Days can be locked in two different ways.
Firstly, when exporting salary data in the Export a salary basis procedure. If you have the Export of salary basis option, the Lock records for adjustment box will be checked by default when exporting a salary basis.
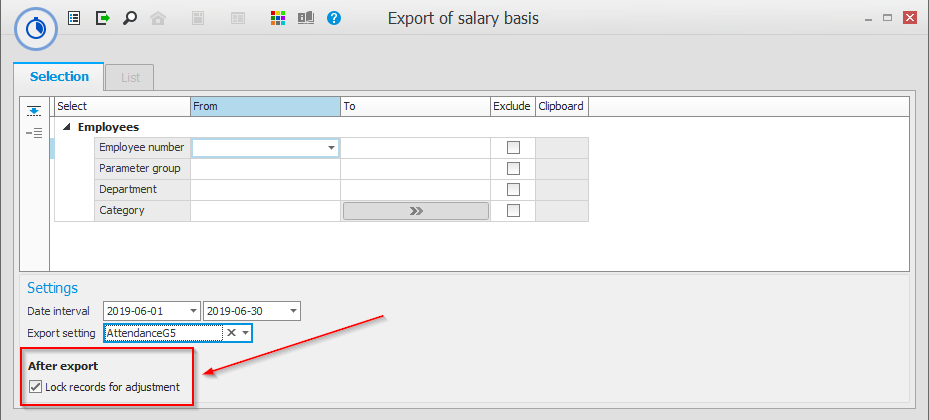
It is also possible to lock days for adjustment in the Lock/unlock attendance recording items procedure. This is also the procedure to be used when recorded items need to be unlocked. You can either lock or unlock attendance recording items under Settings.
In the Authorize/Adjust recording procedure, a padlock is shown to the right of the Authorized checkbox when a day is locked for adjustment.
The Log date is the date on which the change was made. The Actual date is the date to which the change refers.
For example, if on July 10 you adjust an item recorded on May 5 that affects a time bank balance, it will be registered in the time bank log. The log date is therefore July 10 – as this is when the adjustment was made. The actual date (May 5) remains unchanged.
In the Historical balance list type, under the Time bank log procedure, you can then view the balance of the time bank by searching for either the log date or the actual date.
The difference between the two is that the log date shows the exact balance for the date of the time bank in question. Any adjustments made subsequently are therefore not included. Instead, Actual date includes adjustments made after the date you have searched – but which nevertheless affected the balance for that particular day.
If, for example, you want to check the exact comp balance for May 31 – that is, the same balance shown to employees in the Recording terminal when they clocked out on that day – you must select the Historical balance list type and the Log date option.
On June 5 I adjusted a day in May which negatively affected the balance by 2 hours. If I had checked the Actual date for May 31 instead, the balance would have been two hours lower than if I had checked the log date.
Accordingly, the log date does not include these 2 hours since the adjustment was made a few days later. The actual date includes all adjustments that may have been made later which affect the balance for the day I have chosen to view.
Flex zones for breaks must be specified in order for employees to be able to clock in/out for breaks. The flex zones are added to the schedule, and can be applied to breaks as required. In order for an employee to be able to clock in/out for breaks, flex time must be allowed in the employee’s parameter group. This can be checked in the Parameter groups procedure.
It is most likely that you have forgotten to check the Show all I can adjust box before clicking Load  .
.
New time banks can be added under the Time banks tab in the Basic data – Attendance procedure. In order for the parameter group to be able to use the time bank, an absence code must be linked to the time bank in the Parameter groups procedure.
You can register bridging days by selecting Holiday for the days in question in the Calendars procedure under General registers.
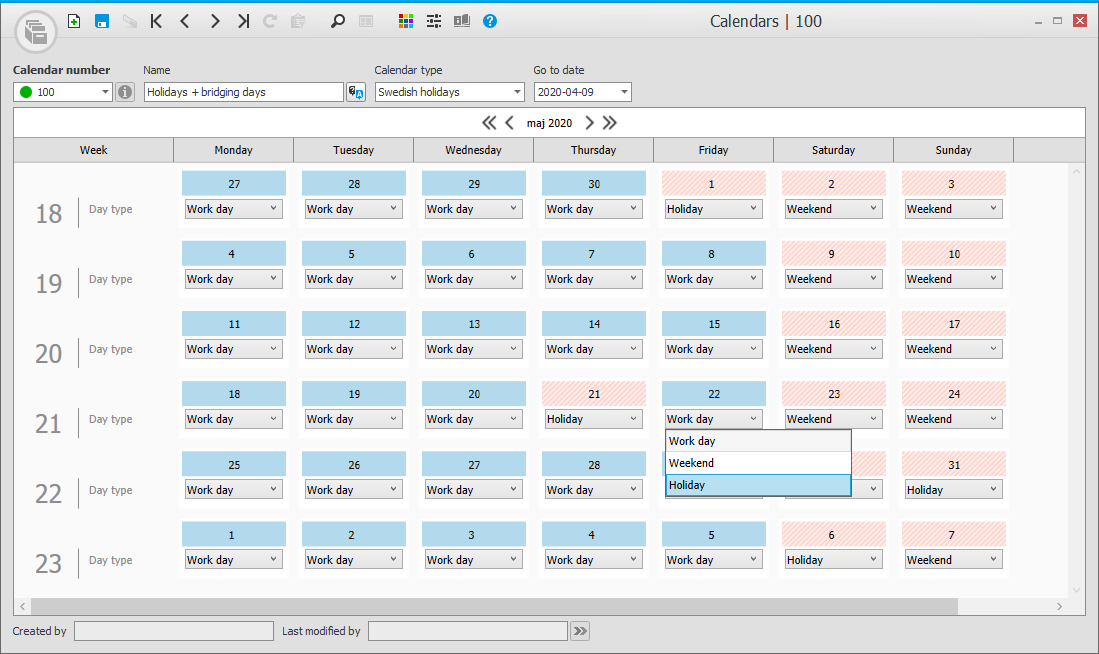
In the Schedule cycles procedure, under the Holidays acc. to column, you can select the calendar number with your bridging days.

When an employee leaves the company and the final salary payment is processed, the employee should be blocked. This is done by checking the Blocked box in the Personnel records – Time recording procedure. You can also enter an end date here for the period of employment.
If recording takes place in error, this can be adjusted in the Adjust work tab in the Authorize/Adjust recording procedure.
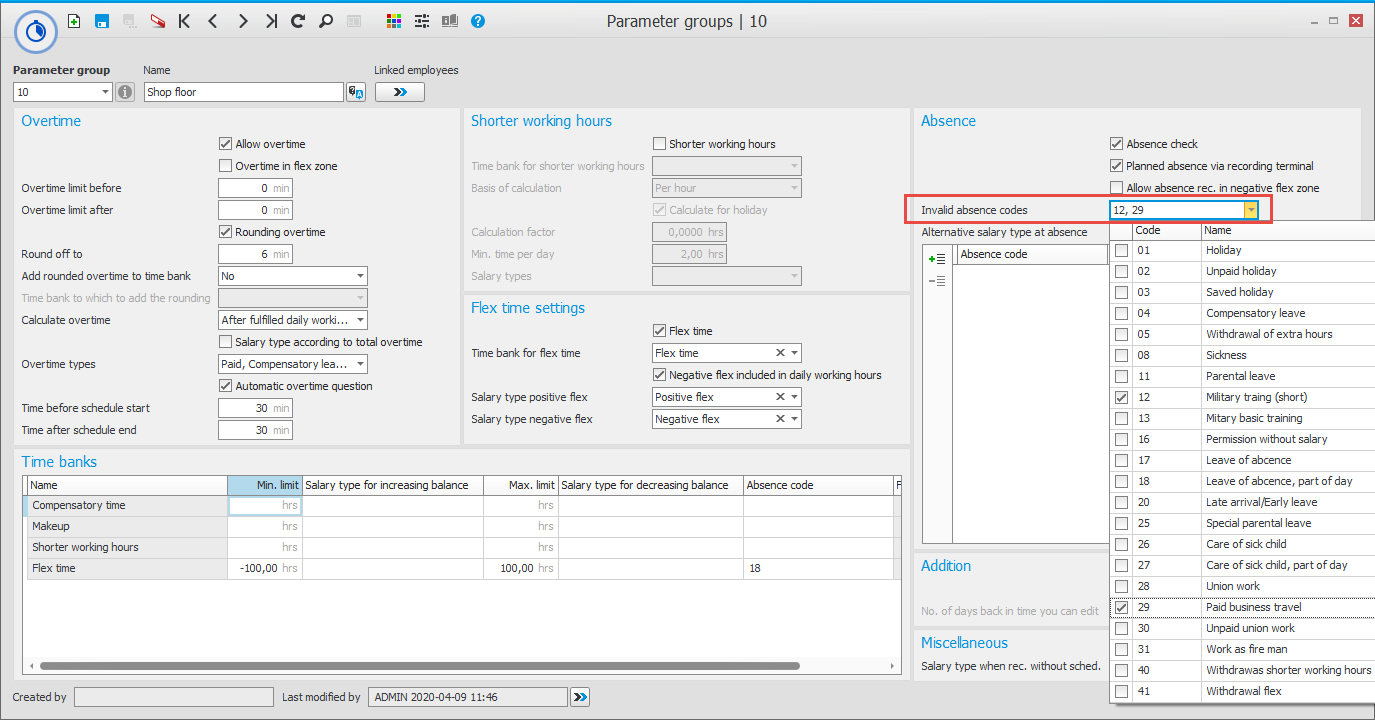
It is not possible to delete an absence code which has been used previously. If you don’t want employees to be able to see and use the absence code any more, you can hide it in the Parameter groups procedure. Select the absence code/s to be hidden under Invalid absence codes.
|
Feedback:
|
||

|
  
|